How to Prepare a Roof Opening for a Roof Window Installation: A Step-by-Step Guide
Bringing natural light into the heart of your home starts long before the window is installed. A successful project begins with one essential task: preparing the roof opening. When done correctly, this step ensures your window fits perfectly, remains watertight, and performs reliably for decades.
In this roof window installation guide, we’ll take you through everything you need to know from early planning and marking out the opening to structural framing and weatherproofing. Whether you’re an experienced installer or tackling your first project, careful preparation makes all the difference.
Before You Cut: Essential Planning & Preparation
A roof window installation involves far more than cutting through timber and tiles. It requires designing an opening that complements your roof’s structure while protecting your home from the elements.
Every successful FAKRO roof window installation begins with proper planning, choosing the right location, assembling the correct tools, and ensuring safe working conditions before making the first cut.
Choosing the Ideal Location: Light, Access & Roof Structure
Before cutting a roof opening, consider what you want to achieve. A well-positioned roof window can transform a dark attic into a bright, inviting space. South-facing roofs provide greater direct sunlight, while north-facing openings offer consistent, diffused light ideal for offices or studios.
Think about access too; you’ll need to open, clean, and maintain the window with ease. Finally, assess the roof structure carefully. Identify the positions of rafters, beams, and any obstacles such as pipes or wiring. Locating the window between rafters reduces the need for extra framing and helps preserve the roof’s structural integrity.
Sizing the Opening vs. Sizing the Window
The relationship between your chosen window and the roof opening is critical. Manufacturer instructions provide exact dimensions; typically, the rough opening should match the window size with a small allowance for insulation and flashing.
If the fit is too tight, installation becomes difficult and may place stress on the frame. If it’s too loose, you risk leaks or thermal bridging. Double-check your measurements before cutting; accuracy at this stage saves substantial work later.
 Please ensure you follow your local health & safety requirements.
Tools & Safety Equipment: The Professional Checklist
Before heading onto the roof, gather all necessary tools and safety equipment. Proper preparation prevents delays and keeps you safe while working at height.
Your toolkit should include:
-
Tape measure, pencil, and chalk line
-
Hand saw or circular saw
-
Drill, screwdriver, hammer, and utility knife
-
Level, square, and spirit level
-
Nails, screws, and timber for trimming
-
Safety helmet, gloves, harness, and non-slip footwear
A stable ladder or scaffold platform provides support and reduces fatigue. A steady workspace results in cleaner cuts and fewer mistakes.
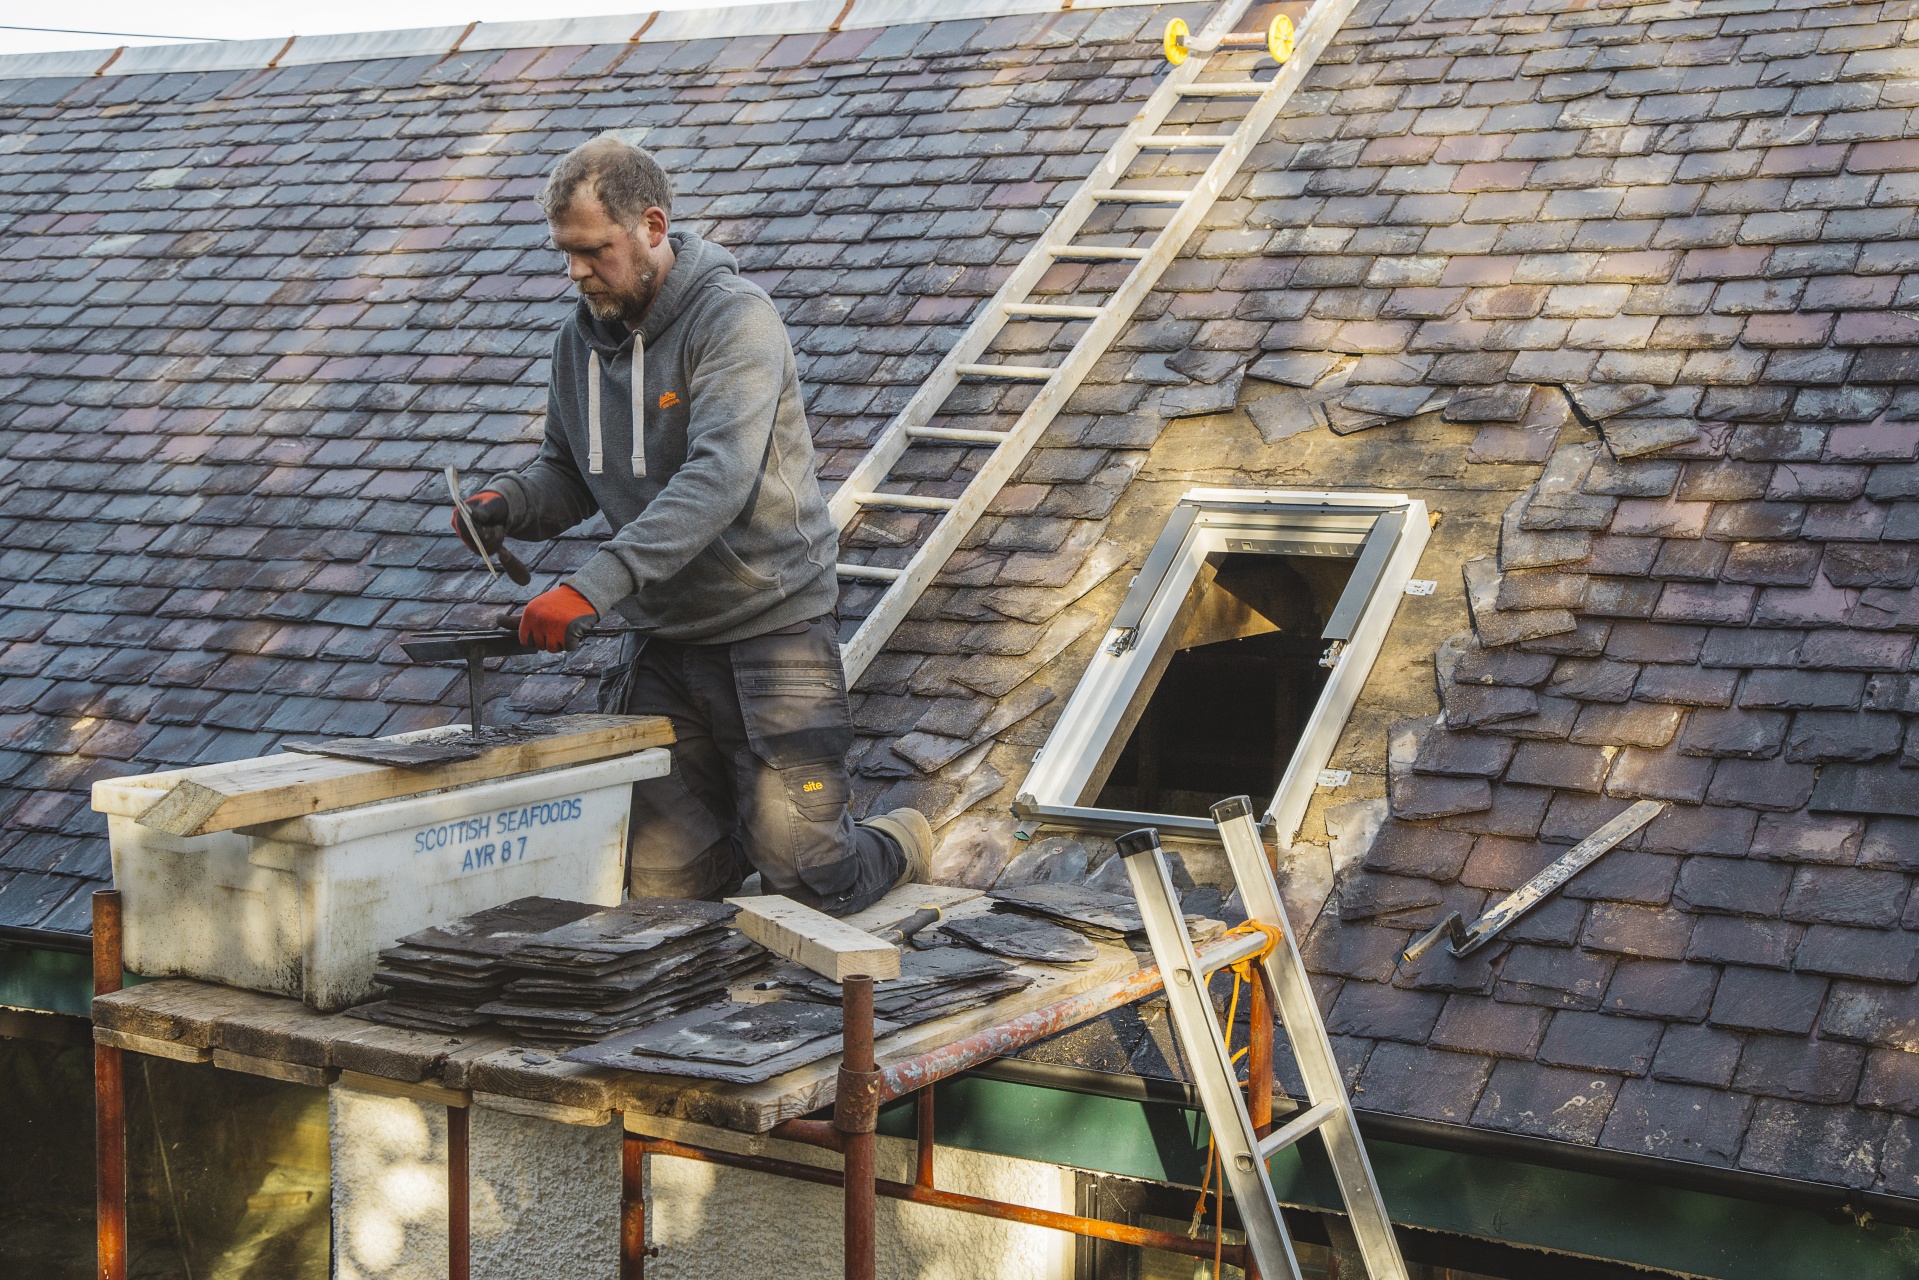
The 7-Step Guide to Creating the Roof Opening (for Rafter Roofs)
Once planning is complete, you can begin the build. The steps below outline how to create and reinforce the opening safely and accurately for a typical rafter roof.
Step 1: Marking Out the Location from Inside
Begin inside the loft. Measure carefully between rafters and mark the centre of your intended window position. Use a chalk line to outline the opening on the plasterboard. Drill pilot holes at each corner so they are visible from the outside. These guide holes indicate exactly where to cut later.
Precise marking now prevents hours of adjustment on the roof.
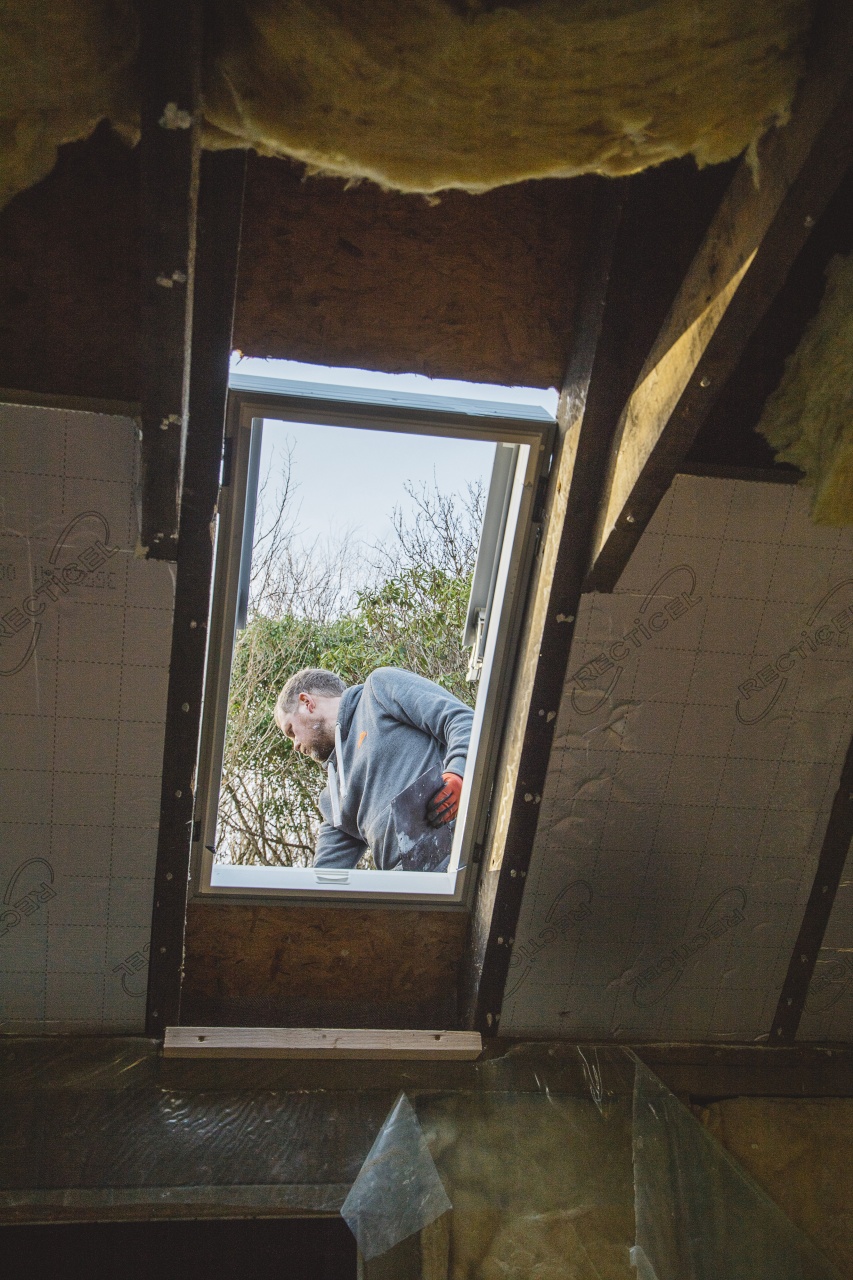
Step 2: Removing Internal Finishes & Insulation
Remove plasterboard, vapour barriers, and insulation within the marked area. This exposes the rafters and gives you full access to the structure. Take care not to damage surrounding materials or wiring. If pipes or cables run through the space, reroute them before continuing.
Step 3: Removing Roof Membrane/Felt and Battens
Move outside and locate your pilot holes. Remove the tiles or slates within the marked area and at least two rows surrounding it. Cut the underfelt or membrane along your outline and remove any battens crossing the opening to expose the rafters.
Keep the removed tiles close - many will be reused when fitting the flashing.
Step 4: The Critical Cut - Cutting the Rafter(s)
This is the most technical stage. Using a saw, cut through the rafters along the guide holes to form the opening. If your window is wider than the space between the existing rafters, one or more rafters will need to be cut.
Before cutting, fit a temporary brace to prevent the structure from shifting. Once the section is removed, you’ll replace it with horizontal trimmers in the next step to ensure the load is transferred safely to adjacent rafters.
Step 5: Building the Trimmer Frame (Structural Support)
Now build the frame that will support the window. Fix a pair of trimmers, one above and one below the opening, between the uncut rafters. These members form the new structural frame and replace the strength lost when the original rafter was cut.
Secure the joints with screws or bolts to prevent movement. You should now have a rigid, rectangular opening ready for installation.
Step 6: Ensuring the Opening Is Plumb, Level & Square
Even minor misalignment can cause issues with operation and weatherproofing. Check that the frame is square by measuring both diagonals; they should match. Use a spirit level to ensure the sides are vertical and the top is perfectly level.
A precise frame speeds up installation and ensures the flashing sits flush with the roof surface. Taking a few extra minutes here guarantees a professional finish later on.
Step 7: Preparing for Weatherproofing (The FAKRO Advantage)
Once the opening is secure, clean the surrounding area thoroughly. This is the ideal moment to prepare for sealing and insulation before the window is fitted.
Ensure underfelt collars, vapour barriers, and insulation kits are on site. Using purpose-made flashing ensures a correct, watertight connection between the window and your roofing material.
FAKRO prefabricated flashing systems are designed for specific window models and roof types, making installation quicker and more reliable. They fit perfectly, improve thermal performance, and provide long-term protection against leaks. For finishing details, including insulation collars, membranes, and sealing tapes, explore our full range of roofing accessories suitable for both professionals and homeowners.
Common Mistakes to Avoid When Preparing a Roof Opening
Even small errors at this stage can lead to costly repairs. Avoid the following:
-
Skipping structural checks: Always identify load-bearing rafters before cutting.
-
Incorrect measurements: Misplaced pilot holes can result in misaligned openings.
-
Weak framing: Poorly fixed trimmers may shift over time, causing gaps or leaks.
-
Using the wrong flashing: The wrong type can compromise waterproofing — always match flashing to roof pitch and covering.
-
Insufficient insulation: Missing or loose insulation leads to heat loss and condensation.
-
Rushing the weatherproofing: Inadequate sealing almost always results in leaks.
By working carefully and following each step of this FAKRO roof window installation process, you’ll achieve a durable, professional result.
Cutting into a roof may seem daunting, but with a solid plan, the right tools, and patience, it becomes a straightforward task. Each accurate cut, aligned frame, and well-sealed joint contributes to a high-quality finish — and a brighter, more comfortable space beneath your roof. If you do not feel comfortable carrying out this work, please speak to a professional.